Mastering the reverse lunge is a game-changer for building strong, stable, and powerful legs. This joint-friendly movement is a cornerstone of any effective lower-body reverse lunges workout. Here’s your ultimate guide to performing it perfectly, whether you’re using weights or just your bodyweight
Why the Reverse Lunge? The #1 Reason to Step Back ✨
If you’re wondering what reverse lunges are good for, the answer is simple: everything. By stepping backward instead of forward, you significantly reduce the stress on your knees, allowing you to focus on building strength and improving hip flexibility with better form and control.
🦵 How To Do Reverse Lunges: The Complete Guide
“The reverse lunge is one of the most joint-friendly, muscle-building lower body exercises you can do. Unlike forward lunges that can stress the knees, reverse lunges offer better control, greater glute activation, and a safer movement pattern for most people.”
🔍 What Makes Reverse Lunges Special?
Reverse lunges shift the load onto your front leg’s glutes and hamstrings while reducing shear forces on the knee joint. They also train your balance and coordination in a way that translates directly to walking, running, and climbing stairs.
Whether you’re new to lunges workout or an experienced lifter, mastering the reverse lunge builds functional strength that carries over to everything else you do.
📝 How To Do Reverse Lunges: Step-by-Step
1️⃣ Find Your Stance
Stand tall with your feet hip-width apart. Engage your core, pull your shoulders back, and look straight ahead. This is your starting position for every rep.
2️⃣ Step Back
Take a controlled step backward with your right foot, landing on the ball of your foot. Your left foot should remain flat and stable. Don’t rush this step. Control is everything.
3️⃣ Lower Down
Bend both knees to lower your hips straight toward the ground. Aim to create two 90-degree angles. Your front thigh should be parallel to the floor, and your back knee should hover just above it. Your torso stays upright throughout.
4️⃣ Drive Up
Push through the mid-foot and heel of your front (left) leg to powerfully return to the starting position. Squeeze your glute at the top. The power comes from your front leg not your back.
5️⃣ Repeat
Complete all reps on one side before switching, or alternate legs for a more dynamic flow. Both approaches work; choose based on your goals.
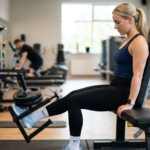
🏋️ Level Up: How to Add Weights to Your Reverse Lunge
Once bodyweight feels easy, adding weight is key for continued growth. Here are the most common ways:
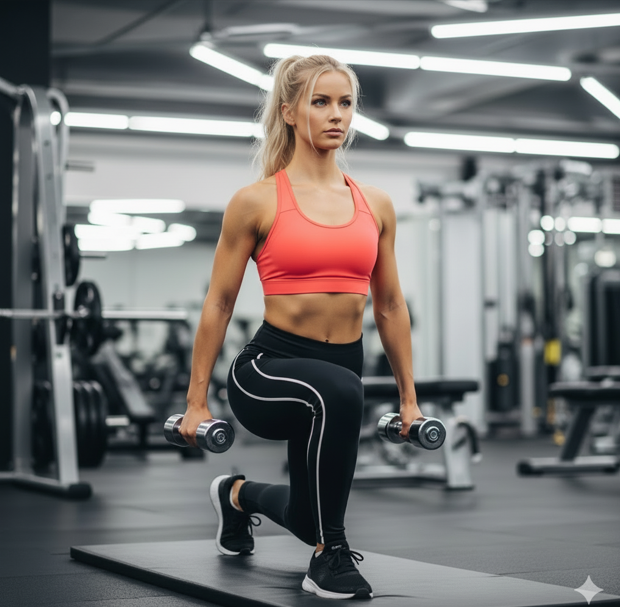
Dumbbells: Hold a dumbbell in each hand, letting your arms hang by your sides. This is the easiest way to start, as it helps with balance.
Kettlebells: Hold one kettlebell in the “goblet” position (at your chest), which also helps reinforce an upright torso. A kettlebell workout with reverse lunges builds serious leg strength and stability.
Barbell: Rest a barbell across your upper back (like a back squat). This is for advanced users due to the increased core stability required.
The movement pattern remains exactly the same. Focus on maintaining your upright posture and controlled descent, even under load.
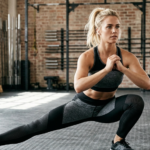
🔥 Want a Greater Challenge? Try Deficit Reverse Lunges
For advanced lifters seeking even more strength and flexibility, deficit reverse lunges are the answer.
How: Stand on a small, stable platform (like a weight plate or a step). Perform the reverse lunge as usual, but now your back foot will step down onto the floor, creating a deeper range of motion.
Why: This increases the stretch on the glutes and hamstrings of the front leg and demands greater stability and flexibility. It’s an excellent addition to any legs workout routine.
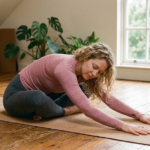
🧘 Warm-Up & Mobility for Reverse Lunges
Before performing reverse lunges, prepare your body with these dynamic movements:
Leg swings – Hold a wall and swing one leg forward and backward for 30 seconds per side. This wakes up the hips and hamstrings.
Cat cow stretch – On hands and knees, alternate between arching and rounding your spine for 8-10 rounds. This cat cow stretch mobilizes your entire spine and connects breath to movement.
Thread the needle stretch – From hands and knees, slide one arm under the other, resting your shoulder on the floor. Hold for 20 seconds per side. This thread the needle stretch opens the upper back and shoulders, which helps maintain an upright torso during lunges.
Single Leg RDL – Perform 5-8 reps per leg without weight to activate the hamstrings and glutes. The Single Leg RDL reinforces the hip hinge pattern that supports lunge mechanics.
Leg extensions – Sitting on a chair, extend one leg straight and hold for 2 seconds. Repeat 10 times per leg. This gentle leg extensions movement prepares the quads for controlled lowering.
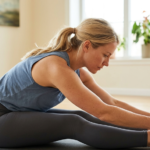
🧘 Post-Workout Stretches for Reverse Lunges
After your lunges exercise, your muscles need to return to resting length. These stretches maintain flexibility and reduce soreness:
Glute stretch – Lie on your back, cross one ankle over the opposite knee, and gently pull your thigh toward your chest. Hold for 30 seconds per side. This glute stretch releases the deep hip rotators that work hard during lunges.
Hip flexor stretch – Kneel on one knee, tuck your pelvis, and press your hips forward. Hold for 30 seconds per side.
Hamstring stretch – Sit with one leg extended, reach toward your toes, keeping your back straight. Hold for 30 seconds per side.
Including these stretches after your legs workout improves recovery and maintains the range of motion you need for deep, controlled lunges.
⚠️ Safety Tricks & Common Mistakes
🛡️ Safety Tricks
- Keep Your Torso Upright: Avoid leaning forward. Think “chest up, core tight” throughout the entire movement
- Watch That Front Knee: Ensure your front knee tracks in line with your toes and doesn’t cave inward
- Find Your Stride: A stride that’s too short will overwork your quads; one that’s too long can strain your hip flexors. Find the Goldilocks zone for two 90-degree angles
- Control the Descent: Lower yourself as if you’re sitting onto a chair, controlled, not dropping
❌ Common Mistakes
- Rushing the Movement: Don’t bounce at the bottom. Control the descent and explode up with control
- Letting the Back Knee Slam Down: Gently tap the floor if needed, but don’t put weight on that knee
- Neglecting the Core: A loose core leads to a wobbly lunge. Brace your abs as if you’re about to be tapped in the stomach
- Looking Down: Keep your gaze forward to maintain a neutral spine
🔄 How Reverse Lunges Fit Into Your Routine
| Workout Focus | How Reverse Lunges Help |
|---|---|
| Lunges workout | The foundation of any lower body training plan |
| Legs workout | Builds quad, hamstring, and glute strength unilaterally |
| Single Leg RDL | Complements the hip hinge with a single-leg squat pattern |
| Leg extensions | Works the quads in isolation; reverse lunges work them in function |
FAQs❓
Q: What are the main benefits of reverse lunges?
A: They build unilateral leg strength, improve balance and stability, enhance hip flexibility, and are significantly easier on the knees than forward lunges. They’re a cornerstone of any lunges workout routine.
Q: How often should I do reverse lunges?
A: Incorporate them into your lower body or full-body workouts 1-2 times per week, aiming for 3 sets of 8-12 reps per leg.
Q: Are reverse lunges better for glutes or quads?
A: They target both! A longer stride emphasizes the glutes and hamstrings, while a shorter stride places more focus on the quadriceps.
Q: What’s the difference between a reverse lunge and a deficit reverse lunge?
A: A deficit reverse lunge is performed standing on a raised surface, which increases the range of motion and intensity for greater muscle growth and flexibility.
Q: Can I do reverse lunges if I have knee pain?
A: Always consult a doctor first. However, the reverse lunge is often recommended for those with knee issues as it places less stress on the knee joint compared to forward variations.
Q: How do I progress my reverse lunges?
A: Add weight (dumbbells, kettlebells, barbell), increase reps, or try deficit reverse lunges. You can also slow down the lowering phase to increase time under tension.
🌟 Pro Tip
Imagine you’re performing a squat with one leg. The power and drive should come almost entirely from your front leg. Your back leg is just there for balance and control, not to push off. Think of it as a single-leg exercise with a “training wheel” behind you. This mental cue shifts tension to the glutes and hamstrings of the front leg, where it belongs.