Ever felt that nagging tightness in your lower back after a long day of sitting? Or noticed your knees caving in during a squat? The culprit is often a lazy gluteus medius. The clamshell exercise is like a wake-up call for these sleepy side-glutes, improving your stability and banishing aches from your back, hips, and knees .
Think of it as the ultimate “on” switch for your lower body. By mimicking the opening of a shell, this gentle yet powerful move builds a rock-solid foundation for everything you do, from running to simply standing up straight. Let’s dive into how you can master it for a more stable, pain-free, and flexible you! 🦵
💪 Key Benefits of Clamshells Exercises
Adding clamshells exercises to your routine is a game-changer. Here’s why:
-
🔥 Wakes Up Your Glutes: It specifically targets and strengthens the gluteus medius and minimus the muscles responsible for hip stability . This helps prevent other muscles from overcompensating and causing pain.
-
🛡️ Injury Prevention Powerhouse: Strong glutes stabilize your pelvis and align your knees, which is crucial for preventing common injuries in runners, cyclists, and anyone active .
-
💆♀️ Eases Lower Back Tension: By stabilizing your pelvis, this exercise takes undue pressure off your lumbar spine, offering significant relief from back pain .
-
🏋️♀️ Boosts Athletic Performance: A strong, stable pelvis translates to more power and efficiency in squats, lunges, and even your daily walks . It’s a vital warm ups for any leg day.
-
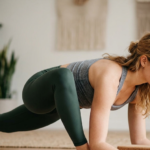
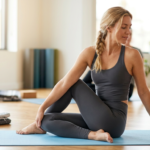
🧘♀️ Improves Overall Flexibility: While mainly a strengthening move, it works in tandem with stretches like the cat cow stretch and butterfly stretch to increase overall lower body flexibility and mobility, helping you move more freely.
📝 Step-by-Step Instructions
Ready to get started? For the Traditional Lying Clamshell:
-
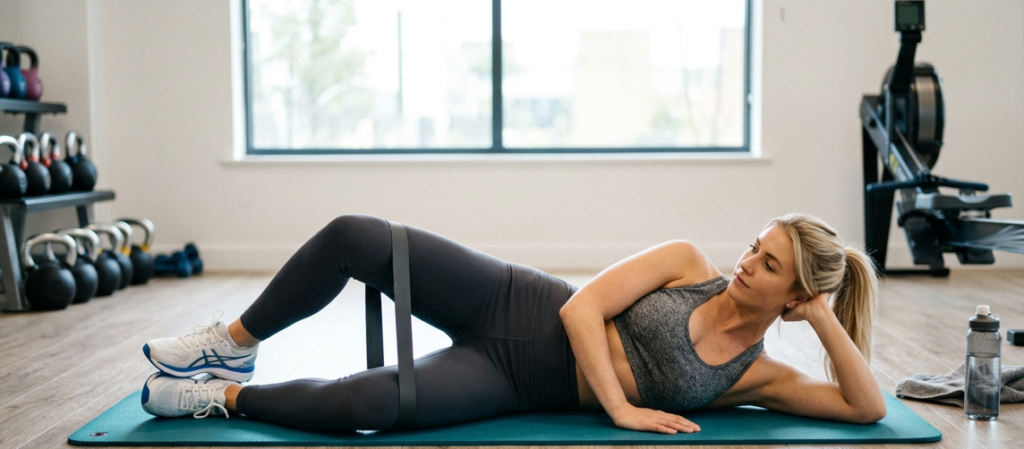
Start Position: Lie on your side with your legs stacked and knees bent at about a 45-degree angle. Rest your head on your lower arm, and place your top hand on the floor in front of your hip for stability .
-
Set Your Foundation: Ensure your hips are stacked directly on top of each other. Engage your core by pulling your belly button toward your spine. This protects your back .
-
The “Open”: Keeping your feet touching, exhale and slowly raise your top knee as high as you can without moving your pelvis or lower back. Your movement should come purely from the hip .
-
Squeeze & Pause: At the top, imagine squeezing a small ball between your glutes. Pause for a second or two.
-
The “Close”: Inhale and slowly, with control, lower your knee back to the starting position . That’s one rep! Aim for 15-20 reps per side.
🔄 Modifications for Everyone
-
🟢 Beginner: Focus on form. Don’t worry about how high your knee goes. Mastering the control and squeeze is more important than range of motion. Do 2 sets of 10-12 reps without resistance .
-
🔴 Advanced: Place a mini resistance band just above your knees. This adds constant tension and fires up those muscles even more . You can also try the standing clamshell exercise standing on one leg, lift the opposite leg out to the side with a band for a serious balance challenge .
📊 Quick Reference Table
| Muscle Groups Worked 🎯 | Difficulty Level ⭐ |
|---|---|
| Primary: Gluteus Medius & Minimus (Hip Abductors) . | ⭐ (Easy) |
| Secondary: Gluteus Maximus, Core (for stabilization) . | Low skill floor, but high focus on mind-muscle connection. Perfect for all levels. |
🧠 FAQ’s
Q: How often should I do the clamshell exercise?
A: To build strength and endurance, you can do it daily. For endurance, aim for 3 sets of as many reps as you can do with good form. For pure strength, try 4 sets of 6-10 reps with a resistance band every other day .
Q: Why does my hip hurt when doing clamshells?
A: Pain often means you’re engaging the wrong muscle! If you feel a pinch in the front of your hip, you might be using your hip flexors (TFL) instead of your glutes. Try rolling your top hip slightly forward to target the glute better .
💡 Quick Tip (Optimize this!):
To get the most out of this exercise, press your bottom knee firmly into the floor. This creates a stable anchor and ensures you’re using the correct muscles from the very start .
⚠️ Safety Tricks & Common Mistakes
🛑 Top 3 Common Mistakes
-
Rocking the Hips: Lifting your knee by tilting your pelvis backward or arching your lower back is the biggest mistake . This works your back, not your butt! Fix it: Keep your hips locked in place like they’re glued to the floor.
-
Rushing the Movement: Using momentum to swing your leg up takes the tension off the glutes . Fix it: Slow down! Count 2 seconds to lift, hold, and 2 seconds to lower.
-
Rolling the Pelvis Backward: This is a common compensation to make the move “easier” but defeats the purpose . Fix it: Place a pillow under your waist for support to maintain a neutral spine.
🧘 Safety Tricks for a Safe Stretch
-
Start Unweighted: Master the bodyweight movement with perfect form before adding a band .
-
Engage Your Core: A braced core is your best protection against lower back strain .
-
Don’t Overstretch: You don’t need a massive range of motion. Focus on the quality of the squeeze. If it hurts, stop! .
-
Listen to Your Hips: If you feel persistent pain, you might have tight hip flexors that need a gentle butterfly stretch or a cat cow stretch to improve flexibility before doing clamshells . Remember to warm up with these gentle moves first!
💡 Quick Tip
“Squeeze like you’re holding a credit card between your glutes” – this mental cue instantly activates the right muscles and keeps your lower back out of the movement.
🔹 Press your bottom knee firmly into the floor – it creates a stable anchor, preventing hip rocking and ensuring your glutes do all the heavy lifting.
🔹 Exhale as you lift, inhale as you lower – syncing your breath with the movement boosts core engagement and gives you better control throughout each rep.
🔹 Quality over quantity! A slow, controlled 2-second lift with a 1-second squeeze at the top is far more effective than rushing through 20 sloppy reps.
🔹 For an extra burn, add a resistance band just above your knees – it increases tension and fires up those glute medius fibers like nothing else!