Introduction
Welcome to the world of the bridge pose, a foundational yoga posture that’s far more powerful than its simple appearance suggests! Also known in Sanskrit as Setu Bandha Sarvangasana (which literally translates to “construction of a bridge”), this elegant backbend creates a beautiful arch with your body that resembles, you guessed it, a bridge. The bridge yoga pose primarily targets your glutes, hamstrings, and spinal muscles while also opening your chest, neck, and hip flexors. Think of it as a two-for-one deal: you’re building strength while gaining flexibility, and who doesn’t love that combination? Whether you’re looking to relieve lower back tension, improve your posture after a long day of sitting, or simply calm your mind, the bridging pose offers something for everyone. Plus, it’s considered a beginner-friendly inversion, meaning your head stays below your heart, which has a naturally calming effect on your nervous system.
✨ Key Benefits of Bridge Pose
Incorporating the bridge yoga pose into your routine offers a treasure trove of physical and mental rewards. Here’s what you can look forward to:
-
🧠 Calms the Mind and Reduces Stress: As a gentle inversion, bridge pose helps quiet the brain and soothe the nervous system. It’s like hitting a reset button for your mental state after a hectic day .
-
💪 Strengthens Your Posterior Chain: This pose is a powerhouse for strengthening your glutes, hamstrings, and lower back muscles. It’s essentially a yoga version of a glute bridge, but with added benefits for your spine .
-
🧘♀️ Improves Spinal Flexibility and Posture: By extending your spine, bridge pose counteracts the effects of hunching over computers and phones. It opens up your chest and shoulders, encouraging a tall, confident posture . Improving your spinal flexibility can also alleviate lower back pain.
-
🫁 Opens the Chest and Lungs: The arching motion lifts and opens the front body, stretching the chest and hip flexors. This expansion allows for deeper, more revitalizing breaths .
-
🩺 Supports Overall Wellness: Regular practice of the yoga pose bridge can aid digestion, improve circulation, and even provide relief from symptoms related to menstruation and menopause .
📝 Step-by-Step Instructions
Follow these steps to build your bridge pose safely and effectively. Remember, yoga is a journey, not a destination, so listen to your body!
Getting Started:
-
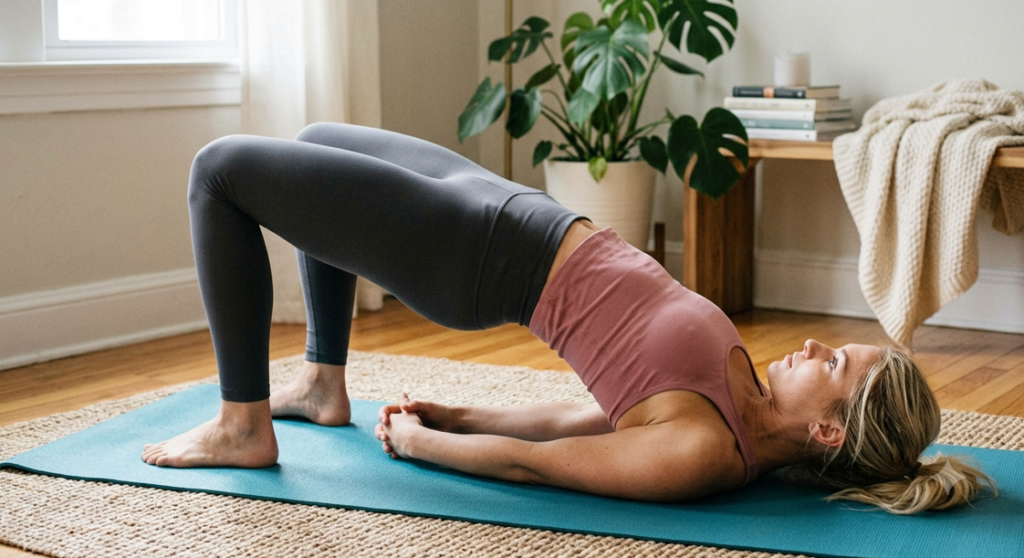
Lie flat on your back with your knees bent and your feet flat on the floor, about hip-width apart. Your heels should be close enough that you can just graze them with your fingertips .
-
Place your arms alongside your body, palms facing down, and ensure your shoulders are relaxed away from your ears.
Lifting Up:
-
Inhale deeply. Press firmly into your feet and the palms of your hands to begin lifting your hips towards the ceiling .
-
Roll your spine off the mat one vertebra at a time, starting from your tailbone, until your thighs are roughly parallel to the floor .
Holding the Pose:
-
For an extra challenge and deeper chest opening, roll your shoulders underneath you and clasp your hands together, pressing them into the floor .
-
Keep your knees parallel and directly over your ankles. Engage your glutes and core to support the lift, but avoid squeezing your glutes too hard .
-
Hold the posture for 30 seconds to one minute, breathing smoothly and deeply .
Releasing:
-
Exhale and slowly roll your spine back down to the floor, starting from the upper back and lowering your tailbone last .
✨ Modifications for Beginners & Advanced Yogis
-
🧘♀️ Beginners / Supported Bridge Pose: Place a yoga block or a folded blanket under your sacrum (the bony part at the base of your spine) for support. This allows you to rest and enjoy the benefits of the supported bridge pose without strain . You can also keep your arms by your sides instead of clasping them underneath you .
-
🧘♂️ Advanced Practitioners: To deepen the stretch, try walking your shoulders under you and interlacing your fingers. For a greater challenge, lift one leg straight up towards the ceiling while holding the pose, or practice the pose with your heels lifted off the floor .
📊 Quick Reference Table
| Muscle Groups Worked | Difficulty Level |
|---|---|
| Primary: Gluteus Maximus (glutes), Hamstrings, Erector Spinae (lower back muscles), Core (transverse abdominis) . | Beginner . While accessible for beginners, holding the pose builds significant endurance and strength . |
| Secondary: Chest (pectorals), Hip Flexors (psoas), Neck, Shoulders, Pelvic Floor . |
🚨 Safety Tricks & Common Mistakes
Build a bridge pose that’s strong and safe by keeping these points in mind:
🛡️ Safety Tricks
-
🛏️ Protect Your Neck: Ensure your weight rests on your shoulders, NOT on your neck. Keep your head in a neutral position and avoid turning it side to side .
-
⬆️ Press Through Your Heels: Actively press your heels into the ground to engage your hamstrings and glutes, which protects your lower back .
-
🦵 Keep Knees in Line: Your knees should track directly over your ankles and stay hip-width apart. Imagine holding a block between your thighs to prevent them from splaying out .
-
📚 Consult a Doctor if Injured: Avoid bridge pose if you have a current neck or back injury. Always seek professional medical advice first .
❌ Common Mistakes
-
😬 Overarching the Lower Back: Pushing your hips too high can compress the lower back. The goal is a long, even arch from your chest to your knees, not a sharp bend .
-
🫁 Holding Your Breath: It’s easy to tense up and forget to breathe! Holding your breath creates tension, defeating the pose’s purpose. Focus on steady, even inhalations and exhalations .
-
🦵 Letting the Knees Splay: When your knees drift outward, you lose core engagement and put unnecessary strain on your hips. Keep them aligned .
-
🤛 Forcing the Hands to Clasp: If your shoulders are tight, trying to force your hands together under your back can round your shoulders. Instead, place your arms alongside your body with palms up and focus on walking your shoulders under .
❓ Frequently Asked Questions (FAQs)
Q: What’s the difference between bridge pose and a glute bridge?
A: This is a great question! While they look similar, the glute stretch version used in strength training focuses purely on glute engagement. In contrast, the bridge yoga pose emphasizes a mindful, full-body backbend that opens the chest and spine while strengthening the glutes.
Q: Can I do the bridge pose if I have lower back pain?
A: Yes, you can often modify it for relief! Using a block under your sacrum for a supported bridge pose can help release back tension. However, if you have a severe injury, please avoid the pose and consult a professional.
Q: Is bridge pose good for flexibility?
A: Absolutely! The bridge pose is fantastic for improving flexibility in your spine, hip flexors, and chest, counteracting the tightness caused by sitting all day.
Q: How to do Jump Squats in relation to bridge pose?
A: How to do Jump Squats and bridge pose complement each other in a strength-building routine. While bridge pose strengthens and stabilizes your posterior chain (glutes, hamstrings, back), How to do Jump Squats builds explosive power in the same muscle groups.
Q: What are some good preparatory poses for bridge?
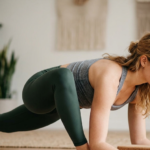
A: Cat cow stretch is the perfect warm-up to mobilize your spine. Other great prep poses include the Cobra pose and a standing backward bend .
💡 Quick Tips for a Better Bridge
-
🧘 Warm-up First: Loosen up your spine with a few rounds of cat cow stretch before attempting the bridge. It’s the perfect prep to increase your flexibility and mobilize your back.
-
🦵 Activate, Don’t Squeeze: Instead of clenching your glutes, focus on engaging your hamstrings and core to lift your hips. This prevents lower back compression.