Introduction
Ever felt like your lower back is stubbornly flat or even pushing into the floor? You might be experiencing a posterior pelvic tilt. This simple yet powerful stretch is your secret weapon for fixing posterior pelvic tilt. At its core, this movement is a brilliant two-for-one: a gentle but effective hamstring stretch and a targeted glute stretch. It works by releasing that tension while simultaneously waking up lazy abdominals to restore your pelvis to a happy, neutral position. Think of it as hitting the “reset” button for your lower spine, combining the release of a hamstring stretch with the activation of a supportive glute stretch. 🔄
Before learning any pelvic tilt exercise, it helps to understand how your entire body connects. Your pelvis is the foundation for your spine. When it’s out of alignment, tension travels up to your neck and down to your knees. For a broader foundation, explore our guide on stretching exercises to see how pelvic positioning affects your whole body. You can also review how to improve flexibility for long-term postural health.
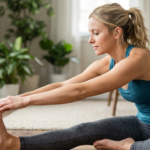
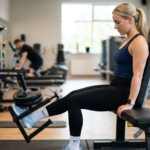
If you spend long hours at a desk, your hip flexors and hamstrings are likely tight. Adding a chair workout or leg swings before your pelvic tilts can help wake up these connected areas. You might also benefit from a chin tuck stretch to release upper neck tension, as poor posture anywhere in the body affects your pelvic position.
Key Benefits: Why This Tilt is a Total Game-Changer
Performing posterior pelvic tilt exercises isn’t just about posture; it’s a full-body upgrade. Here’s what you gain:
- Relief from Aches: Combats key symptoms of posterior pelvic tilt like lower back pain and tight hips.
- Core & Flexibility Boost: Builds foundational core strength and amazing spinal flexibility, making everyday movements smoother.
- Postural Reprogramming: Essential for long-term posterior pelvic tilt correction, teaching your body its optimal alignment.
- Mind-Body Connection: Enhances awareness of your pelvic position, helping you master the difference in the anterior vs posterior pelvic tilt debate.
-
Improved Athletic Performance: A neutral pelvis allows for more powerful squats, deadlifts, and jumps. Pair pelvic tilts with hips exercises and glute stretches for complete lower body power.
-
Better Breathing Mechanics: When your pelvis is neutral, your diaphragm can move more freely. Add cat cow stretch and seated spinal twist to further improve your breathing capacity.
Step-by-Step Instructions: Find Your Neutral Zone
Let’s break down the foundational supine posterior pelvic tilt. This is the first step in learning how to correct a posterior pelvic tilt.
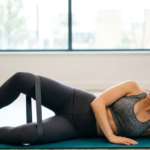
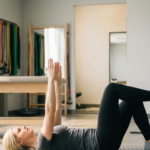
- Get Set Up: Lie on your back on a mat with knees bent and feet flat on the floor, hip-width apart. Let your arms rest comfortably by your sides. This is your starting “neutral.”
- The Tilt Movement: Gently engage your lower abdominals and imagine you’re trying to press your lower back flat against the mat. Your pelvis will roll upwards, and your pubic bone will tilt toward your chin. Avoid pushing hard with your glutes.
- Hold & Release: Hold this gentle tilt for 5-10 seconds, focusing on the stretch and abdominal engagement. Then, slowly release back to neutral.
- Repeat for Fluidity: Aim for 10-15 controlled repetitions, moving with your breath – exhale to tilt, inhale to release.
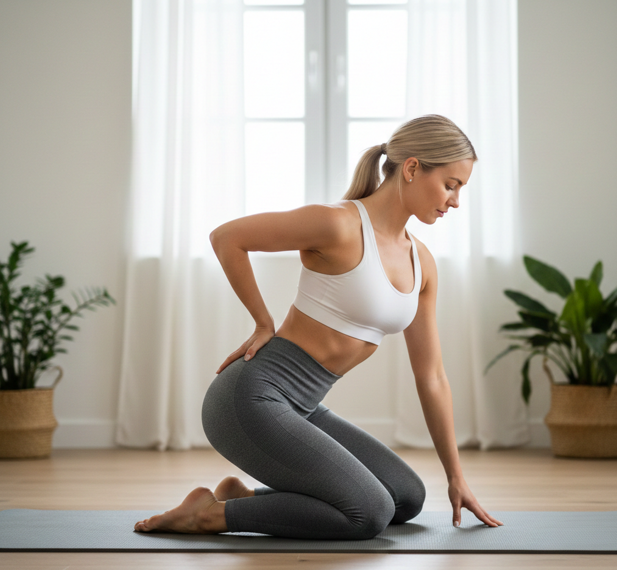
If you have trouble feeling this movement, try placing your hands on your hip bones. This tactile feedback helps you sense the rotation. You can also warm up with pelvic tilts done against a wall before moving to the floor. For those with very tight lower backs, a lying knee twist or childs pose before starting can help release initial tension.
🔥 Modifications:
- For Beginners: Place a hand under the natural arch of your lower back. Focus on just reducing the pressure on your hand instead of a full tilt. This builds the mind-muscle connection.
- For Advanced Users: Try the posterior pelvic tilt seated on a stability ball. This challenges your core stability further as you work on fixing posterior pelvic tilt in a functional position.
-
For Desk Workers: If you feel tightness in your upper back, add a thread the needle stretch or upper back childs pose before your pelvic tilts to free up your entire spine.
-
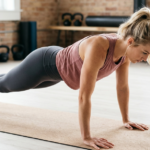
For Athletes: After mastering the supine version, progress to thestanding core exercises variation where you perform pelvic tilts while standing against a wall.
Safety Tips & Common Mistakes to Avoid 🚨
Mastering the move means doing it safely. Here’s how to avoid pitfalls and ensure your posterior pelvic tilt correction journey is effective and pain-free.
✅ Safety Tricks:
- Breathe! Never hold your breath. Consistent breathing promotes flexibility and prevents straining.
- Start Slow: Focus on precision, not range. A small, correct motion is better than a forced, large one.
- Listen to Your Body: Feel a stretch, not sharp pain. Discomfort in tight muscles is normal; joint pain is a stop sign.
-
Warm Up First: Never stretch cold muscles. Perform warm-ups like jumping jacks or leg swings for 3-5 minutes before starting.
- Strengthen Supporting Muscles: Weak glutes and core can prevent proper pelvic control. Add a bird dog exercise and pelvic tilts to your weekly routine.
❌ Common Mistakes:
- Over-Tucking: You’re not trying to do a crunch. Avoid lifting your hips off the mat; it’s a rocking motion, not a lifting one.
- Glute Dominance: If your buttocks are squeezing hard, you’re using momentum, not control. Redirect focus to your lower abs.
- Rushing: This exercise is about neurological re-education. Slow, mindful reps rewire your posture more effectively than fast ones.
- Forgetting Neutral: Always return to a relaxed, neutral spine between reps to appreciate the posterior pelvic tilt before and after effect in your body awareness.
-
Holding Your Breath: Tension increases when you hold your breath. Focus on slow, deep exhales during each tilt.
-
Neglecting Upper Body Posture: Your pelvic position affects your shoulders. For complete postural correction, practice scapular retractions and wall angel stretch alongside pelvic tilts.
🔍 Frequently Asked Questions: Posterior Pelvic Tilt
1. What’s the difference between a posterior pelvic tilt vs anterior pelvic tilt?
Think of your pelvis as a bowl of water 🥣. In a posterior tilt, you’re tipping the bowl backward, spilling water toward your back, flattening your lower spine. In an anterior tilt, you’re tipping it forward, spilling water toward your front, creating an exaggerated arch in your lower back. The goal for most people is a happy, neutral “bowl” that’s level!
2. How long before I see results from posterior pelvic tilt exercises?
This depends on your consistency and starting point, but many people begin to feel a difference in flexibility and comfort within 2-4 weeks of daily practice. Visible posterior pelvic tilt before and after changes in posture often takes 4-8 weeks of dedicated work. Remember, fixing posterior pelvic tilt is about retraining muscle memory; it’s a marathon, not a sprint! 🏃♂️➡️🚶♀️
3. Is the supine posterior pelvic tilt or the seated version better for correction?
Start supine! Lying down removes gravity and makes it easier to isolate the correct muscles this is foundational for posterior pelvic tilt correction. Once you’ve mastered that, the posterior pelvic tilt seated (especially on a stability ball) is fantastic for building functional strength and applying that newfound flexibility to an upright position. One builds awareness, the other builds stability.
4. Can fixing posterior pelvic tilt really help with lower back pain?
Absolutely! ✅ One of the most common symptoms of posterior pelvic tilt is a tight, achy lower back because the spine is pulled out of its natural alignment. By learning how to correct a posterior pelvic tilt, you lengthen tight hamstrings and glutes, activate core support, and restore the spine’s natural curves. This often brings significant relief. (As always, consult a pro for chronic pain.)
5. I’m not sure which tilt I have. How can I tell?
Here’s a quick check: Stand with your back against a wall. If your lower back is pressed flat against the wall with no curve, you likely trend toward a posterior tilt. If there’s a large gap (more than your hand’s thickness) between your back and the wall, you likely trend toward an anterior tilt. Still unsure? A physiotherapist can give you a definitive assessment. 🔍
Your Journey to a Balanced Pelvis
Consistency is key! Whether you practice the supine posterior pelvic tilt or progress to the posterior pelvic tilt seated, regular practice is the true secret to fixing posterior pelvic tilt. By understanding posterior pelvic tilt vs anterior pelvic tilt, you take control of your posture. Stick with these posterior pelvic tilt exercises, and you’ll unlock greater flexibility, alleviate discomfort, and build a stronger, more aligned foundation for all your movements. The path to a pain-free, fluid body starts with a single, conscious tilt! ✨